logo
0

Diaper Caddy Guide: Setup, Accessories & Changing Tips

Learn how to set up a diaper caddy, choose essential changing accessories, organise supplies, and follow safe diaper-changing techniques.

article image

Dr. Kamran

Setting up a safe, efficient diaper-changing routine is one of the first practical challenges new parents face. A well-stocked diaper caddy at the right changing station can make every nappy change quicker, cleaner, and less stressful for both you and your baby. This guide covers how to choose furniture, what to pack, and how to change a diaper safely every time.

What Is a Diaper Caddy and Why You Need One

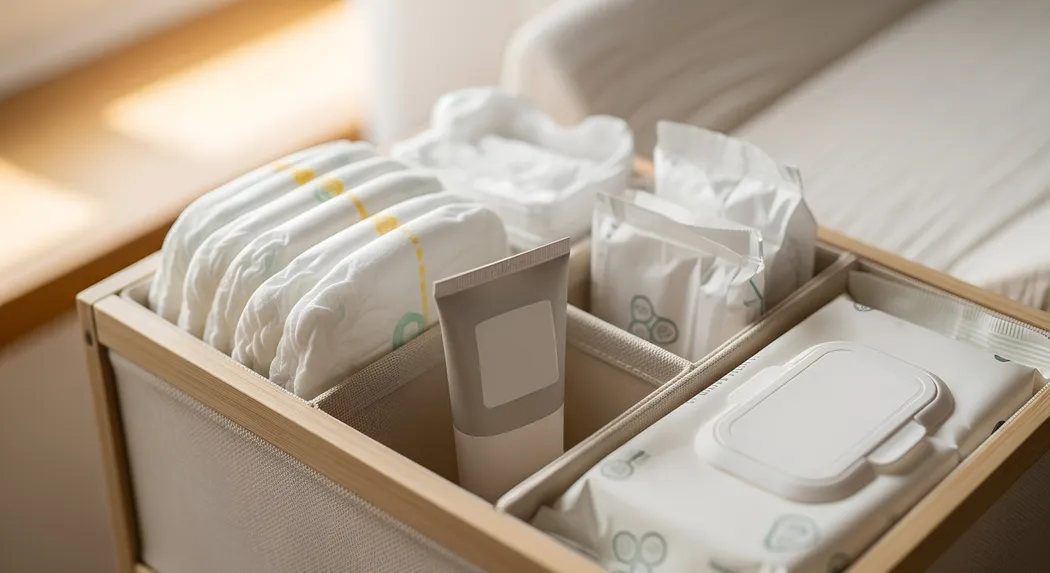
A diaper caddy is a portable organiser, usually a handled basket or bin, that holds your changing essentials in one spot. Unlike a fixed diaper changing table, a caddy moves with you. Keep one in the nursery, another in the living room, and a compact version in your bag for outings.

The portability matters more than it sounds. In the first few weeks, you may change your newborn 8 to 12 times a day. Having supplies within arm's reach, without leaving the baby even for a second, is a genuine safety advantage.

A diaper caddy organiser is not a substitute for a safe changing surface. Think of it as your supply kit and the changing furniture as the foundation.

Choosing Diaper-Changing Furniture: Tables, Stations and Caddies

Getting the furniture right sets the foundation for safe changes every time.

Fixed Diaper Changing Table

A standalone table with guardrails and a dedicated top surface, usually with shelves underneath for storage. Stable and purpose-built, but it stays in one room.

Dresser-Topper Changing Station

A contoured changing pad that straps onto the top of a dresser. It saves space, and the dresser remains useful long after the diapering phase is over. Make sure the dresser top sits at roughly waist height to avoid back strain, and anchor the dresser to the wall to prevent tipping.

Portable Baby Changing Station

A foldable mat or compact unit you can carry room-to-room or when travelling. Useful as a secondary surface alongside a fixed table.

When comparing options:

  • Look for safety rails or raised edges on all four sides to reduce the risk of roll-off.
  • Check the manufacturer's weight limit before purchase; verify the specific limit on the model you choose.
  • The surface should be waterproof and easy to wipe clean.
  • A dedicated diaper caddy organizer pairs well with any surface. Place it within your reach but out of the baby's grasp.

Must-Have Accessories for a Diaper Caddy
 

A well-packed caddy means you never have to turn away mid-change. Stock it with:

  • Diapers in the current size, plus one size up for emergencies
  • Unscented, alcohol-free baby wipes
  • A waterproof changing mat or disposable mat liners
  • Barrier cream (review the contraindications section below before choosing a product for a newborn)
  • Small disposal bags for soiled nappies
  • A spare set of baby clothes for leaks
  • Gentle hand sanitizer, or ensure a sink is nearby

Restock at the end of each day rather than when you run out mid-change. A small zip pouch inside the caddy keeps creams and small items from rolling around.

For skin-contact products, especially creams and wipes, check with your paediatrician before regular use on a newborn under four weeks. Newborn skin is more permeable and sensitive than that of older babies, making it more prone to irritation or absorption of ingredients.

These are the core diaper changing accessories you need before baby arrives. Everything else is a nice-to-have.

Step-by-Step: How to Change a Diaper Safely

Following a consistent routine keeps your baby clean and reduces the risk of infection. Here is how to change a diaper safely every time:

  1. Wash your hands with soap and water before you begin, or use hand sanitizer if a sink is not nearby.
  2. Lay your baby on the changing surface on their back. Keep one hand on them at all times.
  3. Open the soiled diaper but do not remove it yet. Use the front panel to gently wipe away solid matter, then fold the diaper underneath the baby's bottom.
  4. Clean the skin with a fresh wipe. Wipe front to back, especially for girls, to keep bacteria away from the urethra.
  5. For boys, place a clean cloth briefly over the penis to avoid surprises during the change.
  6. Lift the baby's bottom by the ankles, slide the soiled diaper out, and tuck a clean diaper underneath.
  7. If your newborn still has the umbilical cord stump, fold the diaper's front edge down below it. Read detailed guidance on caring for your newborn's belly button during diaper changes to keep the area clean and dry.
  8. Apply a thin layer of barrier cream to clean, dry skin if needed.
  9. Fasten the diaper snugly, leaving room for two fingers at the waistband.
  10. Seal and dispose of the soiled diaper, then wash your hands thoroughly.

Safety Precautions and When to Consult a Doctor

Never leave your baby unattended on a raised surface. Even a newborn can wriggle to the edge faster than you expect. If you need to step away, take the baby with you or place them in a safe cot first.

Additional precautions:

  • Use a safety strap on the changing table as a backup, not a substitute for keeping your hand on the baby.
  • Keep the diaper caddy within your reach but not within the baby's reach. Cream caps and small items become choking hazards once babies start grabbing.
  • Check the changing surface for stability before each use.
  • If diaper edges cause a minor skin abrasion, guidance on treating minor skin cuts or irritation can help while you monitor the area.

See a doctor if you notice:

  • A rash that spreads beyond the diaper area or does not improve after two to three days of home care
  • Blisters, open sores, or bleeding skin
  • Fever alongside a rash
  • A bright red rash with sharp borders, which may signal a yeast infection requiring prescription treatment

Contraindications and Precautions for Diaper Rash Products

Common barrier creams contain ingredients such as zinc oxide or petrolatum. These are generally considered safe for intact skin, but:

  • Do not apply any cream to broken, bleeding, or deeply infected skin without medical advice.
  • Check the ingredient list for potential allergens if your family has a history of skin allergies.
  • Consult your paediatrician before using any rash product on a newborn under four weeks old.
  • Some preservatives and fragrances found in lower-grade products can irritate sensitive newborn skin. Fragrance-free, paediatrician-tested formulations are usually a safer starting point.
  • If a rash worsens after applying any cream, stop use immediately and seek medical advice.

Adverse-event statement: Report any unexpected skin reactions or adverse events related to baby skin-care products to your healthcare provider or the relevant regulatory authority promptly.

Conclusion

A well-organised diaper caddy can make diaper changes more convenient by keeping essential supplies together and within easy reach. However, the caddy should always complement—not replace—a stable, safe changing surface. Choose furniture with appropriate safety features, keep diapers and changing accessories organised, and restock supplies regularly. During every change, keep one hand on your baby, clean the diaper area gently from front to back, and keep the umbilical cord stump clean and dry until it heals. A consistent, safe diaper-changing technique can help make daily nappy changes cleaner, easier, and more comfortable for both you and your baby.

FAQS

How often should you change a diaper?

Most newborns need a change every two to three hours, which works out to roughly 8 to 12 times a day. Change immediately after any bowel movement to reduce the risk of rash.

What is the difference between a changing table and a caddy?

A diaper changing table is a fixed piece of furniture with a raised surface where you change the baby. A diaper caddy is a portable organiser that holds your supplies and can move from room to room or go out with you.

Can I use baby wipes on newborn skin daily?

Unscented, alcohol-free wipes are generally considered suitable for daily use, but check with your paediatrician for the first few weeks, since newborn skin is particularly sensitive and permeable.

What accessories are essential for diaper changing?

The basics are diapers in the right size, unscented baby wipes, a waterproof changing mat, a barrier cream, disposal bags, and a spare outfit. Keep all of these stocked in your diaper caddy so they are always at hand.

How do I treat diaper rash at home?

Change diapers frequently, clean the area gently with plain water or unscented wipes, allow brief nappy-free time to air the skin, and apply a thin layer of zinc oxide barrier cream. If the rash does not improve within two to three days or if blisters appear, consult your doctor.

Apollo 247 Floating Action Button